words Alexa Wang
Podcasting has become a popular medium for sharing stories, knowledge, and entertainment. Whether you’re an aspiring podcaster or looking to upgrade your current setup, understanding the essential equipment for podcasting is crucial to creating content that sounds professional. In this guide, we’ll cover everything you need to set up a podcast that rivals even the most established professional studios. And if you want to see what an outfitted podcast studio looks like, head on over to https://tyxstudios.com/london/podcast-recording-studio/.
Introduction to Podcasting Equipment
Before diving into the specifics, it’s important to understand that the equipment you choose will have a significant impact on the quality of your podcast. While you can start with basic gear, investing in the right tools can make your podcast sound polished and engaging. This article will help you identify the key pieces of equipment necessary to achieve that professional studio sound.
1. Microphones: The Heart of Your Podcast
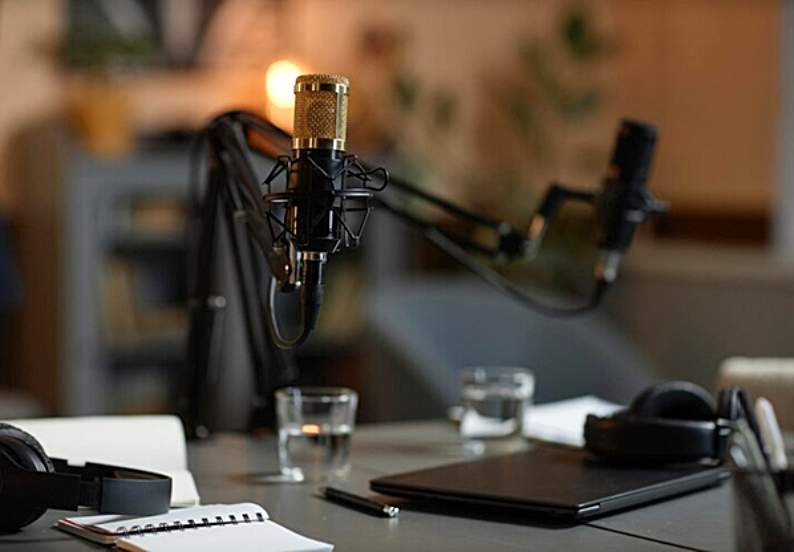
The microphone is the most important piece of equipment in your podcasting arsenal. It’s the tool that captures your voice and sets the tone for your entire show.
- Dynamic Microphones: These are durable and excellent at rejecting background noise, making them ideal for less controlled environments.
- Condenser Microphones: Known for their sensitivity and high-quality sound reproduction, condenser mics are perfect for studio settings where you can control ambient noise.
Recommendation: The Shure SM7B is a popular dynamic microphone used by many top podcasters, while the Rode NT1-A is a favorite condenser mic for those looking for a more nuanced sound.
2. Audio Interface: Connecting Your Microphone to the World
An audio interface is the bridge between your microphone and your computer. It converts the analog signal from your mic into a digital signal that your computer can process.
- Basic Interfaces: For beginners, a simple 2-channel audio interface like the Focusrite Scarlett 2i2 is affordable and user-friendly.
- Advanced Interfaces: For more complex setups involving multiple microphones or instruments, consider an interface like the PreSonus Studio 1824c, which offers multiple inputs and advanced features.
Pro Tip: Ensure your audio interface has phantom power if you’re using a condenser microphone, as these mics require additional power to operate.
3. Headphones: Monitoring Your Sound
Monitoring your audio in real-time is crucial to ensure everything is working correctly. Good headphones help you catch issues like distortion, background noise, or unbalanced audio before they become problems.
- Closed-Back Headphones: These are ideal for podcasting because they prevent sound from leaking out and being picked up by your microphone. The Audio-Technica ATH-M50x is a popular choice.
- Open-Back Headphones: While not ideal for recording, open-back headphones offer a more natural sound and are great for editing and mixing your podcast.
Key Insight: Invest in comfortable headphones since you’ll be wearing them for extended periods during recording and editing.
4. Pop Filters and Windscreens: Reducing Plosives and Wind Noise
Pop filters and windscreens are simple but essential accessories that improve the clarity of your recordings.
- Pop Filters: These are placed in front of the microphone to reduce plosive sounds like “p” and “b” that can cause distortion. A basic pop filter like the Aokeo Professional Mic Pop Filter is effective and affordable.
- Windscreens: These are foam covers that reduce wind noise and breath sounds. They are particularly useful if you’re recording outside or in a room with air conditioning.
Why It Matters: Even in professional studios, pop filters and windscreens are standard because they ensure a clean and clear vocal recording.
5. Boom Arms and Microphone Stands: Positioning Your Mic Perfectly
The position of your microphone can dramatically affect the sound quality. A boom arm or microphone stand allows you to position your mic exactly where you need it.
- Boom Arms: These are flexible and can be easily adjusted to different positions. The Rode PSA1 is a sturdy and reliable option used in many professional setups.
- Desk Stands: If you prefer a more static setup, a simple desk stand can be a good choice. Just make sure it’s sturdy enough to hold your microphone without tipping over.
Consideration: Ensure your stand or boom arm is compatible with your microphone’s weight and size.
6. Mixers: Controlling Your Audio Input
A mixer allows you to control multiple audio inputs simultaneously, making it essential for podcasts with multiple hosts or guests.
- Analog Mixers: These are straightforward and easy to use, like the Yamaha MG10XU, which also includes built-in effects.
- Digital Mixers: Offering more control and flexibility, digital mixers like the Behringer X32 allow for precise adjustments and save settings for future use.
Tip: Even if you’re a solo podcaster, a mixer can help you fine-tune your audio and add effects like compression or EQ in real-time.
7. Recording Software: The Digital Workspace
Recording software, or Digital Audio Workstations (DAWs), is where you’ll capture and edit your podcast. There are many options available, ranging from free to professional-grade software.
- Free Software: Audacity is a popular free option that’s user-friendly and has all the basic features you need to get started.
- Professional Software: Adobe Audition and Logic Pro X offer more advanced features, including multi-track editing, noise reduction, and high-quality plugins.
Advice: Choose software that you find intuitive and comfortable to use, as you’ll be spending a lot of time editing your podcasts.
8. Soundproofing: Creating a Controlled Environment
Achieving a professional studio sound isn’t just about the equipment—it’s also about the environment. Soundproofing your recording space can significantly improve the quality of your recordings.
- Acoustic Panels: These help to reduce echo and reverberation by absorbing sound. They’re easy to install and can be placed on walls and ceilings.
- Bass Traps: These are placed in corners to absorb low-frequency sounds, which can often cause unwanted rumble in recordings.
Pro Tip: Even simple measures like recording in a smaller room with carpet and curtains can make a big difference in sound quality.
9. Backup Solutions: Never Lose a Recording Again
There’s nothing worse than losing a podcast episode due to a technical glitch. Having a backup solution in place can save you from this disaster.
- External Recorders: Devices like the Zoom H5 can serve as a secondary recording device, capturing audio directly from your microphone.
- Cloud Storage: Regularly back up your recordings to cloud storage services like Google Drive or Dropbox to ensure you never lose your work.
Reminder: Always test your backup solutions before recording to ensure everything is functioning properly.
10. Accessories and Extras: The Final Touches
While the core equipment covers the basics, a few extra accessories can enhance your podcasting experience.
- Shock Mounts: These help to reduce vibrations that can travel up through your microphone stand and into your recording.
- Portable Recorders: If you plan on recording interviews on the go, a portable recorder like the Tascam DR-40X is a must-have.
- Lighting: If you’re recording video as well as audio, good lighting can make a big difference. Softbox lights or ring lights are popular choices among podcasters.
Conclusion
Starting a podcast is an exciting journey, but having the right equipment is crucial to ensure your content sounds professional. By investing in quality gear, from microphones to mixers, and paying attention to your recording environment, you can produce a podcast that stands out in a crowded market. Remember, while professional studios have the luxury of top-tier equipment, with the right choices, you can achieve a similar quality in your own setup. Happy podcasting!


