words Al Woods
3D printing has revolutionized the way we approach design and manufacturing, opening up countless possibilities for both hobbyists and professionals. Whether you’re looking to create customized home goods, prototype innovative products, or simply explore a new technological frontier, 3D printing offers a fascinating entry point. For newcomers, the world of 3D printing can seem daunting, with a plethora of materials, techniques, and tools to choose from. This guide aims to demystify the process, providing you with the foundational knowledge needed to embark on your 3D printing journey. Let’s dive into the essentials and explore how you can start turning your ideas into three-dimensional realities.
Essential Tools and Materials
Before you begin your 3D printing journey, it’s crucial to familiarize yourself with the essential tools and materials that will set you up for success. At the heart of your setup is a 3D printer, which comes in various types such as Fused Deposition Modeling (FDM) and Stereolithography (SLA), each suited for different applications and skill levels. These can get pricy so utilizing CREALITY Coupons or any other discounts you can find is highly recommended. Additionally, consider investing in a set of precision calipers and a digital scale to ensure accurate measurements for your designs. To bring your creations to life, you’ll also need a variety of printing materials such as PLA, ABS, or resin depending on the type of printer you have. It’s best to experiment with different materials to find the one that works best for your specific needs.
Understanding 3D Printing Software
Once you’ve acquired the necessary tools and materials for 3D printing, the next crucial step is mastering the software that brings your designs to life. 3D printing software is essential for creating, modifying, and preparing your models for printing. The journey begins with Computer-Aided Design (CAD) software, which allows you to design 3D objects from scratch. Popular CAD software includes Tinkercad, Blender, and Fusion 360, each offering unique features and varying levels of complexity suitable for beginners to advanced users.
After designing your model, the next step involves using slicing software. This software converts your 3D model into instructions that your printer can understand, known as G-code. Well-known slicing software includes Cura, PrusaSlicer, and Simplify3D, which allow you to adjust settings such as layer height, print speed, and support structures to optimize the print quality. Familiarizing yourself with these tools and experimenting with different settings will significantly enhance your 3D printing experience, enabling you to produce high-quality and precise objects.
Setting Up Your Workspace
Creating an efficient and organized workspace is a critical component of a successful 3D printing experience. Start by choosing a suitable location for your 3D printer, ideally a well-ventilated area to minimize any fumes produced during printing. Ensure the surface is stable and level to prevent any disturbances during operation.
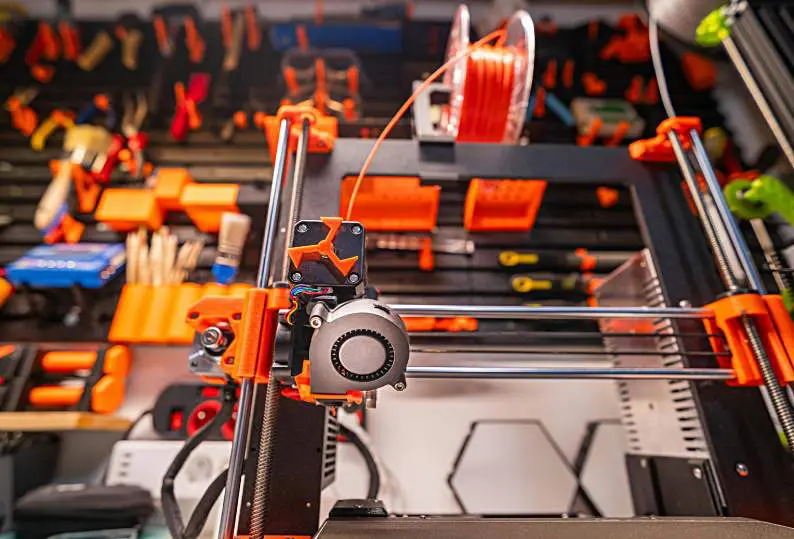
Ample lighting is also beneficial for closely monitoring the printing process and assembling models. Additionally, organize your tools and materials for easy access; a pegboard or dedicated shelving can be excellent for storing various filaments, resin bottles, or maintenance tools. Keeping your workspace tidy not only enhances your workflow but also ensures safety and reduces potential risks associated with clutter or mishandling equipment. Lastly, set up a computer or laptop nearby where you can tweak your designs and monitor your prints with ease.
Tips for Successful 3D Prints
Achieving successful 3D prints requires a blend of preparation, experimentation, and fine-tuning. Here are some essential tips to guide you:
- Level the Print Bed: Regularly check and adjust the level of your print bed to ensure even and stable prints. An unbalanced bed can lead to adhesion issues and incomplete prints. Use a piece of paper to test the nozzle’s distance from the bed and make necessary adjustments.
- Optimize Print Settings: Tailor your print settings to suit the material and design specifications. Adjusting parameters such as temperature, print speed, and layer height can drastically impact the quality and precision of your final print.
- Calibrate and Maintain Your Printer: Periodically calibrate your printer to ensure it performs optimally. Regular maintenance, including cleaning the nozzle and ensuring all mechanical parts are functioning smoothly, can prevent unforeseen errors and enhance print quality.
- Choose the Right Adhesion Method: For better adhesion of your print to the bed, use suitable methods such as glue sticks, painter’s tape, or special adhesion sheets. These can help in preventing warping, especially for large or intricate designs.
- Monitor the Printing Process: Keep a close eye on the first few layers of your print as this is crucial for a successful start. Being nearby allows you to react quickly if any issues arise, saving time and materials.
Embarking on a 3D printing journey can be both exciting and rewarding, offering endless possibilities for creativity and innovation. By understanding the essentials of tools, materials, and software, and by creating an efficient workspace, you lay the foundation for successful printing experiences. Remember to experiment with different settings and materials, and maintain a mindset of continuous learning and adaptation. Fine-tuning your skills and knowledge will not only enhance the quality of your prints but also expand the horizons of what you can achieve. As you print your way into this fascinating world, let your curiosity guide you, and turn your digital ideas into tangible realities.

