words Al Woods
Murals are an absolute must-do in the modern interior decor code as murals can totally change the look of a space while elevating its aesthetic values and adding character to the wall. And to make all these values of murals more accessible and convenient, wall mural wallpapers have become pretty popular. The Ever wallpaper is one of the leading businesses that provide these beautiful and aesthetically pleasing wall murals wallpapers.
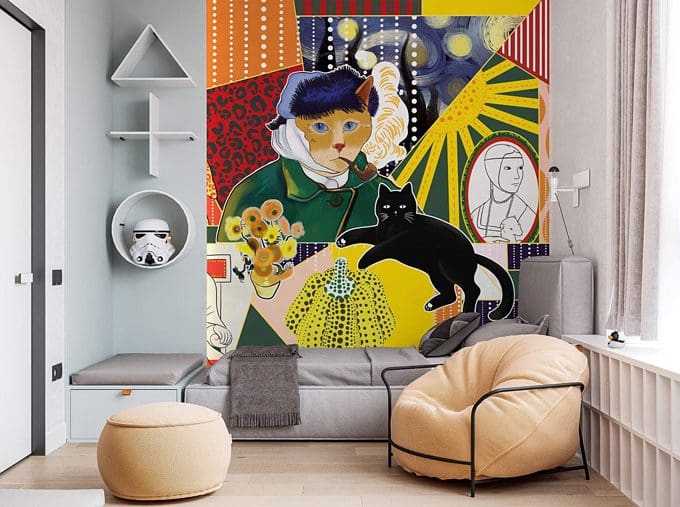
You might, at last, find your ideal mural wallpaper and then hire a professional installer to install it or may even do it by yourself, but preparing your wall for the installation of the mural wallpaper has to be done by you so that you personally can take care of the perfection of the installation. The process of the installation starts way before the actual installation starts; at the preparing stage of the wall. The stage of preparation is very important as it serves as a foundation for the best possible installation of the wallpaper.
So, if this is the first time you are opting for a wall mural wallpaper installation and don’t really know where to start from, here’s how to prepare your wall for the installation so that you can avoid the possible difficulties in the installation process.
Smoothening the wall
Now, what exactly is a perfectly installed wall mural wallpaper? Well, a perfectly installed wallpaper has no visible bumps or hollows visible through it. So it is important to make sure that your wall is as smooth as possible before the installation. Inspect your wall well and remove any kind of nail or hook, etc. After removing these things from the wall, you might find that the wall now has small holes, cracks, and hollows that can make the wall unnecessarily textured. So, fill up these gaps with a spackle and then sand down any visible annoying little bump on the wall.
It is okay if your wall is a little textured but the bit with deeper textures and faults can be a problem for the mural wallpaper that is to be installed. Smoothening the wall makes sure that the wall holds the wallpaper well and there is no problem regarding peeling off of the wallpaper.
Cleaning the wall
After smoothening the wall, you have to clean the wall. As you use sandpaper to sand down the imperfection of your wall, small particles of dust cover the whole wall and create a layer on the wall. This layer is loosely dwelling on the wall and can mess things up if you paint or install your mural wallpaper on them. Thus, cleaning becomes important. Clean the wall with a strong soap or cleaning agent. Also, clean the wall again with a wet cloth before 24-48 hours of the wallpaper installation to ensure that the wall is clean and the surface is dust and grease-free for the wallpaper to stick to the wall the best.
Paint and primer
Installing mural wallpapers on a painted and unpainted wall has its own pros and cons. But in both cases, you have to make some pre-installation preparations. Egg-shell, Satin, and semi-gloss finish paints go the best with the wall mural wallpapers whereas latex paint can be the worst option as this paint is tearable and can tear very easily in the future while you try to remove the wallpaper.
Now, after painting, installing the wallpaper directly on drywall is also not a very good idea as the paste that is used to stick the wall mural wallpaper can get soaked majorly by the wall leaving not enough adhesion left for the wallpaper. Thus, the best way to handle this is to seal the wall with a primer before the installation so that the wall doesn’t absorb the paste.
Conclusion
Understanding the process of preparing your wall for a wall mural wallpaper is the most important part of the installation as it helps you make the most out of your investment. So if you have finally found the wallpaper of your dreams, prepare your wall first so that the wallpaper can look aesthetically pleasing and you can avoid each and every installation mistake that makes your mural wallpaper less durable and unpleasant.


